This blog consists of descriptions of my various vintage cameras and my experiences in using them.
I welcome your comments and additional information.
I am also happy for people to write their own reviews of their old cameras for inclusion in this blog.
This is a West German camera made between 1953 ad 1957. It is a simple viewfinder camera which is clearly built to a price but quite well made within that constraint. This camera has been well used - witness the scuff marks around the tripod boss - and, at least latterly, stored badly - the nickel plating is corroded indicating that storage has been been somewhere damp. The pictures are of the camera as I received it. I shall be doing an intensive clean this week and I shall post a picture of the clean camera for comparison.
Wirgin Edixa 1 (C) John Margetts
lens: Steinheil Cassar triplet focal length: 40 mm apertures: f/3.5 to f/16 focus range: 0.9 m to infinity lens fitting: fixed shutter: Gauthier Vero speeds: 1/25, 1/50, 1/100, 1/200 flash: PC connector film size: 35 mm
The camera measures 120 mm by 60 mm deep and 75 mm high. It weighs 427 g without a film in
place. Being a viewfinder camera, it has very few controls.
Starting, as always, with the top plate. On the right-hand end is the film advance lever. This moves through around 180 degrees but needs two throws to advance one frame. The lever is on a ratchet and several small movements will have the same effect. This is one area where the camera is clearly built to a price as the lever consists of a bent piece of metal - not the most comfortable of levers in use. To the left of the film advance lever and close to the front edge of the top plate is the shutter release button. This is fairly small, nickel plated, and is threaded for a standard cable release. It is well placed for the right-hand index finger in normal use.
The centre portion of the top plate is raised. At the front of this raised portion is the name 'Edixa' in Art Deco lettering. Behind the lettering is a screw head (7 mm diameter) which is used to reset the frame counter. This needs to be set to the film length as it counts down to zero - i.e. it tells you how many shots are left rather than how many are taken.
Wirgin Edixa 1
On the left-hand edge of the raised portion is an accessory shoe. This has no flash contacts and so is a cold shoe in flash terms. In use, this is just as likely to have had a rangefinder in it as a flash gun.
On the left of the top plate (left of the raised portion) is the rewind knob. There is no fold-out crank here, but the central portion lifts up to provide a fairly ergonomic grip.
The front of the camera has the shutter housing centrally placed. The shutter is a GauthierVero shutter which is basically a cut-down Prontor shutter (a further evidence of design to a price). This shutter offers four speeds (1/25, 1/50, 1/100, 1/200) plus B There is no self-timer on a Vero shutter and there is no flash synchronisation setting - flash is provided for with a PC socket on the side of the shutter housing - this is X synch for electronic flash guns.
The iris diaphragm offers apertures from f/3.5 to f/16. The range of shutter speeds together with the range of apertures allows for good exposures with most films available 50 years ago and most light conditions. This might seem a bit meagre by modern digital standards but I have never found it to be limiting in my photography.
The lens is a Steinheil Cassar lens. The Cassar is a triplet and Steinheil seem to have generally supplied to the lower end of the market but I have always found them to be more than acceptable when stopped down to f/8 or f/11. See the test results further down to see how this particular lens performs. The lens has a focal length of 40 mm which is very slightly wide compared to 'normal' for 35mm photography (which is 43mm). The lens fascia bears the legend 'VL' which I take to mean that the lens is coated - it certainly has a slight colour cast to it. Focusing is by moving the front element of the lens (front cell focusing) rather than the whole lens assembly (unit focusing). This is generally considered inferior to focusing by moving the whole lens but any difference is technical rather than practical. The lens serial number is 889580 which should help me to date the camera precisely if/when I can find appropriate information on the Interweb.
The viewfinder sits above the shutter/lens and is much as I would expect for the time - i.e. rather small by modern standards but much bigger than was usual in the 1930s. It measures 8 mm by 12 mm. To the right of the viewfinder, below the shutter release button, is the maker's name - 'Wirgin' - again in Art Deco style.
There are three items on the back of the camera - all on the top plate. Centrally is the viewfinder eyepiece. this is round with a diameter of 5 mm. This has a circular brass surround which is dangerous to wearers of modern spectacles - mine have extensive scratches on the right-hand lens caused by using old cameras. To the right of the viewfinder eyepiece is the frame counter window. This is a meagre 2.5 mm square and is right at the limit of my eyesight. Right of this, under the film advance lever, is a small slide. Moving this to the left allows the film to be rewound.
Test film
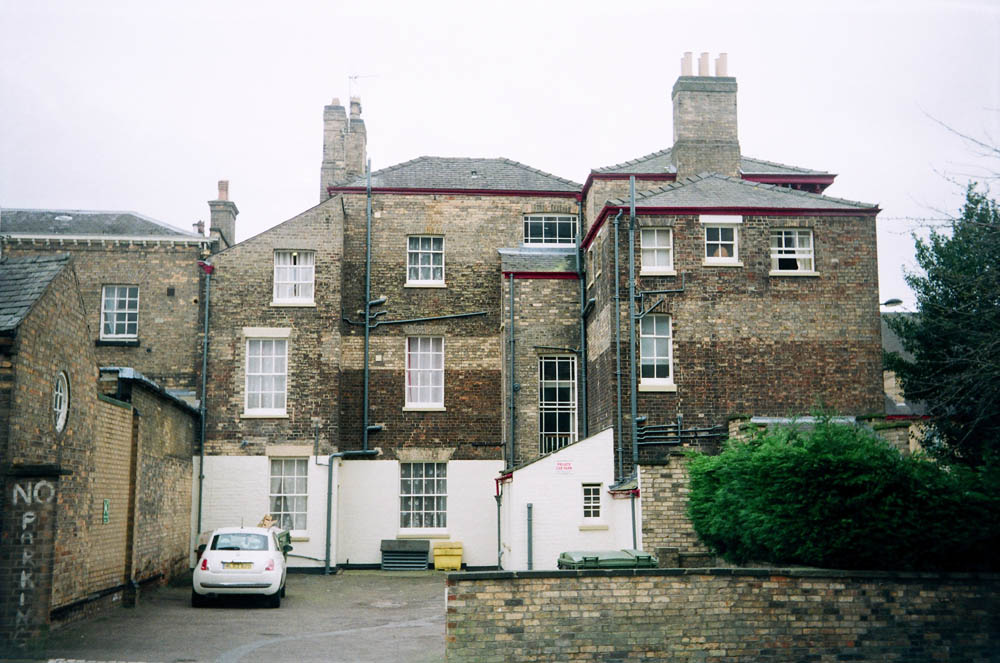
I have now finished the test film and had it developed and scanned by Snappy Snaps in Lincoln. Main negative is the presence of vignetting. Exposure is spot on as is focus (mostly focused at infinity).
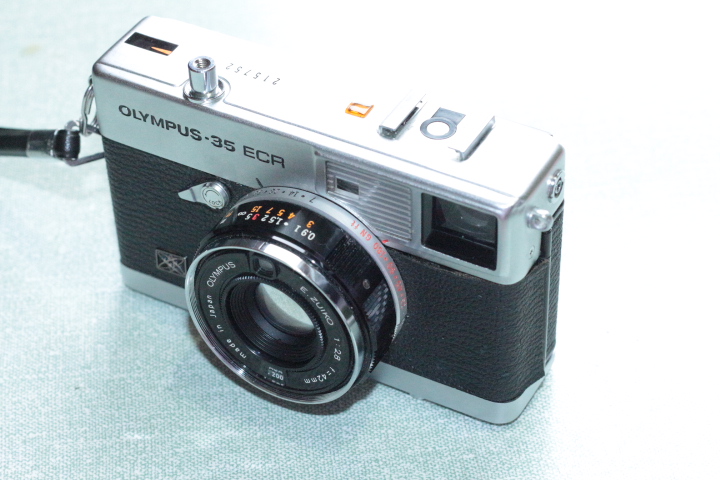
This is a small, compact 35mm camera from Olympus. It is a part of the Olympus 35 line - 12 models with varying complexity. This model came out in 1972 and was produced for two years (as far as I can gather).
Olympus ECR, front view (C) John Margetts
lens: E. Zuiko
focal length: 42 mm
apertures: f/2.8 automatic
focus range: 3 feet to infinity
lens fitting: fixed
shutter: Seiko ESF
speeds: 4 seconds to 1/800 seconds
flash: hot shoe + PC socket
film size: 35 mm
Olympus 35 ECR, rear view (C) John Margetts
First, a description. The camera measures 110 mm wide, 75 mm high and 30 mm deep, not counting the lens, or 50 mm deep, counting the lens. It weighs 450g including a 24 exposure film. The top plate is sparse. On the right is the frame counter. this is reset to 'S' when the back is opened and counts up from zero. 30 mm in from the end of the camera is the shutter release. This is a chrome button and is threaded for a standard cable release - a conical thread to make fitting easier. Just behind the shutter release is the camera serial number. My camera has the number 215752.
Incidentally, to date Olympus cameras (Olympus Trips and Olympus 35 ECR, at least) you take out the film pressure plate and look on the reverse. There are three characters printed on the metal. The first character is a code for the factory where the camera was assembled, the second character is a year number and the third character is a month code. Months run from 1 to 9 for January to September and then X,Y and Z for the last three months. The code on the pressure plate of my ECR is X2Z. (I cannot type the Japanese character in the first position so 'X' instead)) The 2Z signifies the camera was made in year 2 (i.e. 1972) and month Z (i.e. December).
Just to the left of the mid-point is a square orange light. This lights up when the shutter release is pressed part way. This indicates that the battery is good and the camera is ready to use. It does not indicate that the exposure is good as it still lights if the light sensor is covered. Next to this is the accessory shoe. This is a hot shoe and allows for automatic flash use - more later. On the end of the top plate is a PC socket. using this does not to invoke the automatic flash system.
The front of the camera has an anodised aluminium strip (the front of the top plate). On the left this bears the legend "OLYMPUS 35 ECR". to the right are the small rangefinder window (5 x 3 mm) and the larger viewfinder window (12 x 8 mm). The lens/shutter housing is almost central. This houses the Seiko ESF electronic leaf shutter. The lens itself is an E Zuiko lens. The 'E' designation indicates five glass elements (A=1, B=2, C=3, D=4, E=5 etc.). this is a multi-coated lens with a definite blu tinge. Above the lens is the small light meter sensor - a CdS sensor - and below the lens is a window showing the selected film speed. This is marked in ASA but that is essentially the same as ISO. Just around the lens is a serrated ring which turns to select the film speed.
Olympus ECR bottom view
The lens takes 43.5 mm filters which cover the light meter sensor as well as the lens so no exposure correction is required for any filter being used. Around the shutter housing is the focusing ring which has a fairly short throw of about 15 degrees and focusses from 0.91 m (3 feet) to infinity. The scale is marked in both metres and feet but that is really academic as the focus ring is connected to the rangefinder and there is no need to look at the scale. The spot in the rangefinder is green and quite visible making the camera quick and easy to focus.
Between the focussing ring and the body is another ring to set the guide number of the flash being used. This has two scales - one in metres (black) and one in feet (red) - which scale you use depends on the guide number given by the flash gun maker. To the left of the lens/shutter housing is a small horizontal lever marked 'LOCK'. Pushing this down locks both the shutter to prevent accidental shots and also switches off the light meter to preserve the batteries.
The base of the camera has four items on it. On one end is the 1/4 inch UNC tripod boss. next to this, and recessed, is the rewind button (black). In the middle is the battery compartment. This is designed to take two mercury batteries giving a working voltage of 2.7 volts. As mercury batteries are no longer available, I am using two A640 batteries which give a working voltage of three volts. This probably affects the exposure system but the % difference is going to be less than half a stop on the exposure and so is nothing to worry about. Next to the battery compartment is the rewind crank. this folds out and is nice and large - much larger than is usual on an SLR.
Just about all 35mm cameras of this age use foam seals to prevent light coming in around the join of the back. As with most 35mm cameras of this age, the light seals have deteriorated and, in fact, have almost disappeared. These will need replacing before the camera can be used - quite a simple job with the foam being available on the Interweb. When this is done, I will run a terst film through the camera and post the results here.
This is a very non-standard camera. Firstly, it is Italian which means a distinct design philosophy that is very different to the German. Secondly, it has one control - shutter speed: either B or I (Instantaneous).
.
Ferrania Ibis closed (C) John Margetts
lens: Primar
focal length: 75 mm (ish)
apertures: fixed
focus range: fixed
lens fitting: fixed
shutter: Ferrania own
speeds: two: B and I
flash: PC socket
film size: 127
The camera measures 120 mm by 70 mm high and 55 mm deep (closed) or 80 mm (open). It is a small camera and fits entirely in my hand. It also fits comfortably in my jacket pocket so is an eminently usable travel camera. The only down-side is the size of the viewfinder eyepiece which is unusably small while wearing spectacles. It is made entirely from a cast light metal (aluminium?). As far as I can see, there is a single casting for the body and a second casting for the back.
Ferrania Ibis open (C) John Margetts
The lens is held on the front of a chrome tube that slides into the body when not in use. The lens seems to be a single element lens - that is, a meniscus lens and is coated (it has a blueish tint). The shutter is also in the chrome tube and is a simple, everset type. It has two speeds only - Instantaneous or Bulb. the aperture is behind the shutter. the front of the housing is marked 1:9 which I take to be the aperture (but more later). Measuring the distance from the approximate centre of the lens to the film 'plane' gives me a focal length of 75 mm which would be 'normal' for 127 film. If that is right, the aperture of 4 mm diameter would give a fixed aperture of f/19 in which case the 1:9 on the lens fascia is not the aperture. Also on the collapsible chrome tube is a PC socket for flash - no accessory shoe is provided so the flashgun will require a bracket to hold it onto the tripod boss (the standard 1/4 inch Whitworth or UNC thread).
Ferrania Ibis - rear view
The film gate measures 55 by 42 mm so a 'normal lens' would have a focal length of 70 mm so the lens provided is 'normal' - equivalent to 43 mm on a 35 mm camera or 28 mm on a APS-C digital camera. The top of the camera has the shutter release to the right of centre and fairly forward. The viewfinder is pretty much central and to the left is the film advance knob. Being a film camera, there is no need for a rewind knob. On top of the viewfinder is a plate with details of ferrania films of the day.
Inside and the detached back
The back of the camera is held in place at each end by sliding strap lugs. There is a central red window for seeing the frame numbers on the film backing paper.
Inside is redolent of cheap film cameras. To offset the aberrations inherent in a meniscus lens, the film 'plane' is curved (so not strictly a plane). The new film goes at the right and the take-up spool is on the left. Both spools are held in place by a single spring steel strip.
Inside showing the curved film 'plane'
The outside of the camera is painted grey with dark grey leatherette patches. Compared to what Zeiss Ikon and Voigtlander were doing in Germany at the same time; it is a very crude, cheap looking camera but it is not without charm. The camera comes in a purpose made and rather nice leather case. As this camera uses 127 film which, while still available, is rather expensive I shall not be trying this camera with film.
I got interested in Cosina cameras while reading about the cameras they make for Big Name companies - companies like Canon, Nikon and Olympus. I started, many years ago, with the impression that Cosina only made cheap, low-spec cameras. That impression is now updated. My first Cosina was a CT1 (article coming) which is (still) sold by Nikon as their FM10 and was sold by Canon as their T60 and Olympus as their OM2000.
Cosina C1 - (C) John Margetts
lens: Cosina 35-70 mm zoom
focal length: 35-70 mm
apertures: f/3.5 to f/22 (nominally)
focus range: 0.5 metres to infinity
lens fitting: Pentax K-mount
shutter:Cosina metal focal plane
speeds: 1 second to 1/2000 seconds
flash: hot shoe, X synch
film size:35 mm
This camera, the C1, is a much later camera. The outside is plastic and so is (as far as I can tell) the chassis. This makes it feel to hold much like a modern DSLR. That is not a criticism of the cameras as a photographic device but as a collector of old cameras, the tactile component is important to me.
Once manufacturers turned to plastic mouldings, shape restrictions were removed. With this camera, while the internal chassis seems to still be rectangular (cuboid?) the outside has flowing curves. This is partially aesthetic and partially ergonomic. The camera is clearly designed to be held right-handed. There is a curved. raised portion on the front to give the middle two fingers a good grip and a second raised portion on the back to give a secure grip for the thumb. This leaves the index finger to comfortably sit on the shutter release button. The curves continue around the pentaprism hump and in the junction between the body and the lens mount. my personal preference is for more classically designed cameras.
Cosina C1, top plate (C) John Margetts
The top plate has the standard layout - film advance lever, shutter release button and shutter speed selector on the right of the pentaprism hump and the rewind crank/door latch on the left. This camera has a standard hot-shoe accessory shoe (and no PC connector). The film advance lever acts as a shutter lock and light meter switch when the lever is flush with the body.
The front of the camera is unadorned apart from the Pentax K-mount lens mount and the name C1. This is the plain vanilla mount with no electrical contacts or autofocus screw. The rear of the camera is similarly unadorned - there is the viewfinder eyepiece and a window to allow the user to see part of the film cassette: ideal for those of us with virtually no memory.
Inside, the camera has no surprises. The shutter is a vertical travel metal shutter which is, I think, Cosina's own make. This offers speeds from 1 second to 1/2000 seconds and is synchronised for flash at 1/125 - marked in red on the speed selector dial. The speeds on the selector dial go anti-clockwise from 1 to 1/2000 seconds (the opposite way to the Cosina CT1).
Cosina shutter
The plastic back fits without light seals. the technique of moulding the plastic allows for sufficient light baffles without the use of foam. there are two exceptions: a small piece of foam by the hinge and a larger piece around the window to the film cassette. These are in good condition and the camera should still be usable without replacing them.
This camera comes with a TTL (Through The lens) light meter. It is powered by two LR44 batteries which are still available. On this camera, the meter does not work.
The lens that came with the camera is, I assume, the kit lens that Cosina provided with the camera when new. It is Cosina's own 35 - 70 mm zoom lens. It has an aperture range of f/3.5 to f/22 at 35 mm and f/4.8 to f/22+ at 70 mm. It is multi-coated and claims macro ability. This macro ability gives an image:subject ratio of 1:5 rather than the 1:1 ratio that is usually thought of as true macro. Focusing is from just under 0.5 metres (1.5 feet) and the focus scale is marked in both metres and feet.
The aperture scale is rather confusing. The aperture ring sets the size of the aperture (as you might expect) but the f-number is a ratio between focal length and aperture diameter. This means that the marked f/ stop depends on the zoom setting. For setting the aperture at 35 mm focal length there is a red dot for the aperture ring and at 70 mm focal length there is a green line (on the zoom scale, 35 mm is in red and 70 mm is in green). For zoom settings between 35 mm and 70 mm, neither mark will be quite right and you could be up to 1/2 stop out on your exposure, depending on whether you use the red dot or green line. in use, 1/2 stop + or - is neither here nor there. marked f/ stops are from f/3.5 to f/22 but this is clearly the case with zoom setting of 35 mm. At 70 mm, the widest aperture is f/4.8 and the smallest is significantly less than f/22 - I would guess f/32.
The lens mount is Pentax's K mount. It is the plain vanilla mount as introduced in 1975. There are no electrical contacts or auto-focus screw so the lens is fully manual. Any K-mount lens will work with this camera so long as the lens has an aperture ring, and this lens will work on any K-mount camera - but only manually.
The lens is entirely plastic and does feel rather 'plasticky' but the adjustments are all very smooth and the lens looks to be well made.
I already have an article on Yashica Minister III rangefinders. This Minister D is clearly from the same stable.
The camera is about the same size to look at - I suspect the Minister II and D both use the same main casting. The most obvious difference is with the light meter. With the Minister III, the meter cells are selenium cells in a ring around the lens and do not require a battery. The Minister D meter has the sensor on the left edge of the top plate and it does require a battery.
lens: Yashinon
focal length: 45 mm
apertures: f/2.8 to f/16
focus range: 0.8 m to infinity
lens fitting: fixed
shutter: Copal SVL
speeds: 1 second to 1/500
flash: PC socket
film size: 35 mm
The camera measures 135 mm long (not including the strap lugs), 85 mm high and 40 mm deep - 75 mm including the lens.
The controls are as had become standard on (non-SLR) 35 mm cameras. On the right is the film advance lever. this lever moves through about 120 degrees to advance the film one frame which is easily achieved with one movement of the thumb. Between the film advance lever and the right edge of the top plate is a window to the frame counter. This counter is automatically reset to 'S' when the back of the camera is opened. This is two before the counter shows '1' allowing for the film to be wound on two frames to move the fogged film leader past the film gate once the back is closed.
Just to the left of the film advance lever and slightly in front is the shutter release button. this is chrome plated and is 5 mm is diameter. It is threaded for a standard cable release.
To the left of these three, the top plate is slightly raised. on this raised portion are the light meter display and ASA setting. ASA (effectively the same as ISO) can be set from 10 to 400 - about the range of film speeds available in the early 1960s. the film speed can only be set in ASA numbers - there is no DIN scale - but for those who prefer DIN (me!) there is a ASA/DIN conversion scale on the inside of the back door.
The light meter consists of a window to a black and white scale and a pointer - see forward on how to use it.
Left of the light meter is an accessory shoe - no electrical contacts so a 'cold' shoe. On the far left is the rewind crank. This pulls up to release the film cassette when loading/unloading but plays no part in releasing the back.
The front of the top-plate has the viewfinder window - fairly large at 20 mm by 13 mm - and a small rangefinder window at the end of the 'Minister D' logo. To the right of the viewfinder is the light meter cell. This is circular and is around 5 mm diameter in a 15 mm diameter enclosure.
The lens is central in the Copal SVL shutter. Just to the left of the shutter housing is a PC (Prontor Compur) flash connector.
The base plate is uncluttered. It has a button to release the rewind mechanism, a 1/4 inch UNC tripod boss (the old standard for tripods was 1/4 inch Whitworth which is very close to 1/4" UNC), a battery compartment and then usual Yashica recessed catch for the back. This is marked O-P - 'O' for open and 'P' for closed.
The back of the camera, as well as having the hinged back, has the light meter actuating button, the viewfinder eyepiece and a grey plastic plug. This plug hides the rangefinder adjusting screw. last thing to note is the presence of strap lugs at either end.
The lens is a Yashinon f/2.8, 45 mm lens (actually described on the lens fascia as 4.5 cm as was usual up to the 1940s but was old hat by the 1960s). I am told the lens has five elements in four groups. It is, of course, coated as was usual by the 1960s. The camera focusses by moving the whole lens; this is the high quality method of focusing compared to the cheaper method of just moving the front element of the lens.
The lens is set in a Copal SVL shutter:
S - for flash synchronised
V - for Vorlaufwerk (delayed action)
L - for light value settings
The shutter clearly takes its name from the German Prontor shutters - S, SV and SVS.
The lens can focus down to 0.8 m (2.8 feet) and is coupled to the rangefinder. this camera is now 50 years old and the rangefinder patch is fairly dim. However, knowing this is in the centre of the viewfinder it is not necessary to actually see it. It is still quite easy to the secondary images of strong verticals and so the rangefinder is straight forward to use. On the rear of the top plate is a small (5 mm) grey plastic plug. This is easily removed to reveal a small screw which is used to adjust the rangefinder. This camera seems to be already adjusted correctly.
Incidentally, it is possible to improve the contrast of dim rangefinder patches. this can be done by inking in a small black circle in the middle of the viewfinder using a Sharpie or such.
Another nice feature with focusing this camera is parallax adjustment. As you focus the camera closer, the bright lines in the viewfinder move progressively to the right and down. You will still get some parallax error in your framing but you should be able to avoid cutting peoples' heads off.
There is a usable range of f stops from f/2.8 to f/16. This couples with shutter speeds from 1 second to 1/500 seconds. With films rated between 100 ISO and 400 ISO there will be few conditions that this camera will not cope with - at least in the UK; Florida beaches might be a problem.
Setting the exposure takes several steps.
1) press the red button on the rear of the top plate to switch on the meter
2) while holding the red button in, note the number the meter needle is pointing to
3) transfer this number to the outer-most ring on the lens/shutter housing
This sets the exposure but to the camera's choice of aperture and shutter speed. To get either the aperture or speed you want requires a fourth step.
4) turn the inner, gnarled, ring until either the aperture you want, or shutter speed, is against the red index mark. Not every aperture or shutter speed will be available for a given LV setting. For instance, with an LV setting of 17 you are stuck with f/16 and 1/500 and at LV 3 you only get shutter speed of 1 second and an aperture of f/2.8.
This is essentially a shutter priority system as altering the LV will alter the aperture, the shutter speed staying constant until the aperture required is outside the available range.
Most Japanese cameras use black foam in the recess the back fits in. this acts as a light seal. Unfortunately, this foam eventually turns to goo which has happened to this camera. Before I can run a test film I need to clean out the remains of the light seals and fit new black foam - easily secured on the Interweb.
I am a bit of a tight-wad. I very rarely pay as much as £20 for a camera. While this makes for a fairly cheap hobby, it does preclude me from buying many models. For many years, I have been looking wistfully at medium format SLRs - such as Hasselblads, Mamiyas and Bronicas. Unfortunately, you just cannot buy these for under £20.
I have recently retired and this excellent arrangement has bought with it a modest lump sum which has been burning a hole in my bank account. So, one Bronica ETRS has been purchased - at 10x my self-imposed limit (actual cost was £189). This has proved to be a confusing camera to buy. These medium format SLRs are very modular and, looking at Ebay, it is usual to sell each module separately. My problem was that, never having handled one of these before, I was not clear as to exactly which modules were essential and which were optional. I got around this by going to a shop (ffordes in Inverness) and buying a complete system from them with a reassurance that I was buying a complete camera. probably cost me a bit more this way but I also got a six month guarantee as well as peace of mind.
My camera is a basic set-up. It consists of four modules: a body, a lens, a film back and a viewfinder. The only module that is essential is the body - there are no choices here as far as I can ascertain. The lens I have is a 75 mm lens which is 'normal' for the 6 x 4.5 negative format of these cameras. There are other focal length lenses available ranging from 40 mm (equivalent to 25 mm on a 35 mm camera) to 250 mm (equivalent to 150 mm on a 35 mm camera). There are four options for the film back - 120, 220, Polaroid and 70 mm. Only the 120 back is usable as neither the 220, Polaroid or 70 mm film is made anymore.
There are several options for the viewfinder of which the most common are the waist-level finder and the prism finder. I have the prism finder which is essentially what all 35 mm SLRs have. I may avail myself of a waist-level finder in due course.
There are many other options options available, none of which is essential. The only module I need that was not supplied is a neck strap. A lot of people do not use straps - even on very expensive cameras - but dropping things is far too easy not to use a strap. I have fitted a cheap and cheerful Chinese strap.
Description.
I am going to describe each of the four modules in turn and then describe the complete camera.
First, the body. With the other modules detached, the body does not look like very much. It does, however, contain all the electronic controls.
It is a cube - it measures 90 x 70 x 85 mm (OK, not exactly a cube, but near enough) and weighs xxxg.
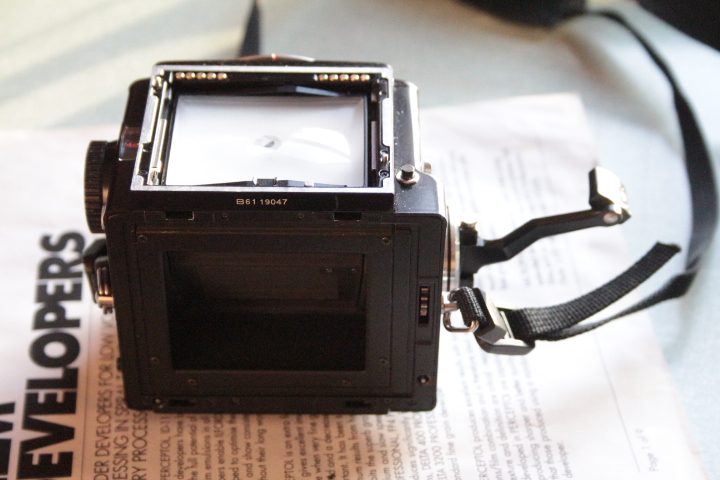
The top face is dominated by the focussing screen. This is plastic and measures 55 mm by 42 mm - the 6 x 4.5 in the camera name is the nominal negative size but the actual size is a bit smaller. This gives an aspect ratio of 1:1.3 - 35 mm cameras are 1:1.5 as are most digital cameras and full frame 120 cameras. This means that I shall have some adjusting to do when composing pictures and printing them. I usually print on A standard paper which has an aspect ratio of 1:1.4 - I shall have to either crop the picture or trim the paper.
The focussing screen is removable - several options are available - but this one has a plain field with a split-image centre surrounded by a circle of micro-prisms.
In front of the focussing screen is a row of ten electrical contacts. These are there to allow for the use of a metering viewfinder - by default, no metering is provided meaning I need to use a hand-held light meter which is my default method of working regardless.
Also on the top are the displays for shutter speed and frame counter both in windows on the sides and also a release button for the viewfinder.
The left-hand face of the body has the shutter speed selector. This is a knob and ranges from eight seconds to 1/500 seconds. Whole seconds are displayed in red, fractions in white.. This might seem a b it meagre by modern standards but is more than adequate with careful selection of film speed.
On the top corner of the left-hand face is a battery check button Pressing this lights a red LED in the corner of the focussing screen. half-way down the right-hand edge is a strap lug. below this is a button to release the film back. last item on this side of the body is a cable release socket threaded for a standard release cable.
The right-hand face of the body is dominated by the film advance. This is a large crank handle that you turn one complete revolution to advance the film one frame, lower the mirror and cock the leaf shutter in the lens. Above this is a small lever. This turns through 90 degrees to allow for multiple exposures on one frame of film. Behind the film advance crank is the second strap lug.
The bottom face of the body has the battery compartment which takes a single 6v battery. In front of this is the 1/4 inch UNC tripod boss.
The rear face of the body cube has fitting s for the film back and an exposed cog for the film advance. In the centre is a large hole which is blanked off by a hinged plate - more of this later.
The front face of the body cube is mostly the lens mount. This is huge by 35 mm and digital standards. It has four lugs and is specific to the ETR range of cameras. Inside the mount are six electrical contacts which are a part of the automatic exposure system. Also inside the mount is the reflex lens.
Below the mount are two chrome buttons. On the right (when holding the camera) is the shutter release button. This ass a knurled collar around it which can be turned to lock the shutter release. Turned fully anti-clockwise, it frees both the release button and the cable release. Turned 45 degrees clockwise, it locks the release button but still allows the cable release to fire the shutter. Turned 90 degrees clockwise, both the release button and the cable release are locked.
In the top corner is a PC socket for flash. No accessory shoe is provided as standard so any flash gun must be fitted to the tripod boss - or you can buy the accessory grip which has a hot shoe on it.
On the left is the lens release button. This needs to be turned and then depressed. While depressed, the lens can be turned clockwise for removal.
in order to have a functioning camera, three things need to be fitted to the camera body: viewfinder, film back and lens. Other options are available but these three are essential.
I am going to start with the viewfinder as this is the simplest. There are choices here - none is provided as standard - and I have the prism finder. This is the same as the viewfinder on a 35 mm SLR film camera or on a DSLR digital camera. It means I can see the image the right way up and the right way around.
A second option is a waist-level finder. this allows the camera to be used without lifting it to your eyes - usually on a tripod. With this finder the image is the right way up but back to front. This needs getting used to but I have no trouble adjusting to other cameras with waist-level finders.
The third option is that of a metering finder. this is essentially a prism finder with a built-in light meter to give TTL (Through The Lens) light readings. I am happy with my hand-held meter.
The film back has four versions. I have the 120 back - it takes 120 size film, believe it or not. Also available are 220 backs, Polaroid backs and 70 mm backs but film is not available for any of these.
The film back holds the film (obviously) and can be removed from the camera with film in it. To do this, you have to insert a thin steel dark slide into a slot in the side of the film back. The film back can be opened tom allow for the inserting or removal of film. Inside the film back is a cradle for holding the film in place and advancing it. This needs to be removed to load film, but exposed film can be removed with the cradle in situ.
The cradle has two holders for the film spools, a cog to engage with the camera body for advancing the film and an external knob for manually advancing the film while loading. A nice touch is the presence on the rear door of the film back of a holder for the end of the film carton as an aide memoir.
The lens is quite a heavy lens. mine is a 75 mm lens. As well as containing the actual glass - five elements in four groups - there is the diaphragm (f/2.8 to f/22) and the leaf shutter. If you have several lenses, each will have its own shutter. These are leaf shutters made by Seiko rather than the focal plane shutters most 'serious' cameras have.
In use.
In use, this camera is an anachronism. The shutter system is that used by Zeiss Ikon in their Contaflex cameras in the 1950s. There are actually two shutters in use. Between exposures, the leaf shutter is open, allowing the user to view the image through the lens. To prevent the film being fogged, there is a secondary shutter in the camera body behind the mirror - the hinged plate mentioned earlier. This secondary shutter is crude - it cannot be used for timed exposures.
When you fire the shutter there is a complex sequence of events.:
1) the leaf shutter closes
2) the mirror lifts out of the way
3) the secondary shutter lifts out of the way
4) the leaf shutter opens for a timed exposure
5) the leaf shutter closes again.
When you advance the film, most of the opposite happens:
6) the secondary shutter closes
7) the mirror comes back down
8) the leaf shutter opens for viewing.
All this makes for quite a resounding clunk - compared to my 120 Ikoflex which only has the leaf shutter to move and is nearly silent and vibration free.
Test film.
This is encouraging. The shutter works fine, there are no light leaks, aperture and shutter speed are at least in the right ball park, film advance is correctly spaced. What is not evident on these small scans is the image quality - it is superb.