Showing posts with label focal plane shutter. Show all posts

Wednesday, 9 November 2016

Cosina CSM


As I have mentioned elsewhere in this blog, Cosina have an undeservedly poor reputation. In fact, in addition to their own designs made under their own name, they make cameras for the big-name camera companies. The Zeiss Ikon rangefinder was made by Cosina as are many Carl Zeiss and Voigtlander lenses.

Cosina CSM
This camera is a Cosina design sold under their own name. It is fairly basic but with an electronically controlled shutter. I can tell that the shutter is electronically controlled because it  works without batteries but at the same slow speed regardless of the speed setting (a fully electronic shutter will not work at all without batteries). With batteries the shutter speeds are clearly variable.

The top plate is standard for a camera made in the late 1970s (introduced in 1978, I think). Far right is a small window for the frame counter. This is reset to zero when the camera back is opened. Next is the film advance lever. This is a metal plate covered with a plastic casing. It sits just proud of the back and is easy to use. It moves through about 210 degrees to advance the film one frame.It is not on a racket so just be moved in one motion.

In front of the advance lever is the shutter release button. this is chrome plated and threaded for a standard cable release. Below the shutter release is a lock switch. It has two positions - A and L. A is the working position and L is the lock position. I quite approve of shutter locks as over the years I have wasted many hundreds of frames of film by accidentally tripping the shutter. This lever is black.

Cosina CSM - top plate
Next along is the shutter speed dial. This runs from 4 seconds through 1 second to 1/1000 seconds. 1/60 is marked in red and I am sure will be the flash synchronisation speed. There are also positions marked in green - M and B. I have no idea what the M position is for and it is not mentioned in the manual (available from Butkus's website). B is for Bulb and is the standard of the shutter remaining open whilst the the shutter release is depressed.

Nested in the tangle of the film advance lever is a small chrome button. Pressing this disconnects the film advance mechanism to allow the film to be rewound.

The pentaprism hump has the accessory shoe on it. This has electrical contacts (so a hot shoe) synchronised for electronic flash (indicated by a red X). Cosina made an automatic exposure device which sat on this accessory shoe and connected to the shutter speed dial - this dial has a raised pin to allow the auto exposure accessory device to turn the speed dial, giving the camera aperture priority automatic exposure.

On the left of the pentaprism is the rewind crank. This is the usual fold-out type. The crank pulls up - to the first position to release the cassette in the camera and to the second position to unlock the hinged back. Between the pentaprism humpand the rewind crank is a white painted circle with e white line through it. The Lin represents the position of the film plane.

The front of the camera is fairly plain. most obvious is the lens mount. This is a 42 mm threaded mount - frequently known as the Pentax thread mount. This was the standard lens mount for several decades and so there are a vast number of lenses still available for this camera. The mount takes automatic aperture lenses (as well as older manual aperture lenses). There is a plunger at the base of the lens mount, just inside the thread. When the shutter release is pressed, this plunger moves forward and depresses a pin on the lens to close the aperture to the preset value. This ties in with the TTL light meter (TTL = Through The Lens). You focus and compose with the aperture wide open (and so with a bright image) and as the shutter release is half-way pressed, the aperture closes and the meter reads the light level. You then either adjust the aperture or shutter (or perhaps both) until the centre greed LED in the viewfinder is lit. Pressing the shutter release the rest of the way releases the shutter and takes the picture.
Cosina CSM - lens mount

Next to the lens mount at the bottom is a small chrome button. Pressing this allows the aperture to open again while the shutter release is partially depressed. You might think it easier to just take your finger off the shutter release button but the plunger does not return to its rest position if you do. If you want to re-compose or re-focus, you need this button.

On the right-hand side of the lens mount is a self-timer lever. This is turned through 90 degrees to set the mechanism.It is released by the shutter release in the usual way. On most cameras, These self-timers are clockwork and you can hear them ticking as the lever rotates back to its start position. Not here. This is an electronic device and the lever does not move back. Instead, a small red LED above the lever flashes once a second for ten seconds. After ten seconds, the shutter fires and the lever snaps back.

On the left of the lens mount are what at first glance appear to be two PC (Prontor Compur) sockets. In fact, only the lower one is - it is marked with a red X. This is for attaching an off-camera flash gun by a cable and is synchronised for electronic flash (by the late 1970s, bulb flashes were no longer usual and not catered for). The top connector is not quite the same as a PC connector and is designed for the automatic exposure device I mentioned above. It is marked with a green A.

On either side of the front of the camera are strap lugs - a small but very important feature to me.

The base of the camera has a battery compartment. It takes two LR44 (or SV44) batteries (which are still available). These power the light meter and the electronic shutter. There is also a standard tripod boss - 1/4 inch UNC thread. This is quite seriously offset from the centre of the camera which means the camera is likely to slope when on a tripod, particularly if a cheap tripod is used - this is a cheap camera so I don't supposed anyone would have used an expensive tripod.

Cosina CSM - base plate
Inside the back of the camera there is little to note. The shutter is a horizontally moving cloth shutter - absolutely standard at this time. The take-up spool has eight attachment positions of a fairly standard design so attaching the film leader would be easy enough.

Being Japanese, the camera relies on foam light seals to keep the film compartment light tight. This camera is 35-odd years old and the foam has long turned to sticky dust. The remains will need to be cleaned out and replaced with new foam before the camera can be used. This is a simple enough job, even for me.

Cosina CSM - inside the film chamber
Inside the viewfinder is uncluttered. There is a ground glass focussing screen with a horizontal split-image spot in the centre and around this is a circle of micro-prisms. The split-image centre works by placing it over a suitable vertical edge in the image. This edge will be split - part to the left and part to the right. When you focus the lens, these two parts move and line up with each other when the focus is correct.

In the absence of a suitable vertical edge, you use the micro-prism ring. When the image is unfocussed, this ring has a very granular appearance. As you get nearer to good focus, the granularity gets less and disappears at good focus.

At the top of the viewfinder are three LEDs. The central one is green and the other two are red arrows. While pressing the shutter release halfway, you adjust the aperture/shutter speed combination until the central green LED is lit steadily. The left hand red arrow lights up when you have too much exposure and the right hand arrow lights up when you have too little exposure. Very easy to use in practice.

The supplied lens - the kit lens if you will - is a Cosina made Cosinon lens - 50 mm focal length and maximum aperture of f/1.7 (and why not the industry standard of f/1.8?). The lens is multi-coated as you would expect from the late 1970s. This lens has an aluminium barrel and appears to be very well made.


Cosinon lens with six sided aperture


Cosinon lens - lens barrel


Thursday, 20 October 2016

Kiev 4 (Киев 4)


My most recent acquisition is this Soviet Kiev 4. It is a straight copy of the Zeiss Ikon Contax III (with only very slight changes).


Kiev 4 - front view

At the end of WWII, the Soviet army had Zeiss Ikon rebuild their production line for the Contax and then, once the line was working properly, they shipped the production line to Kiev in Ukraine. They also renamed the camera Kiev. This camera is a Kiev 4 and is a copy of the Contax III - there was also a Kiev 4a which was a copy of the Contax II. The difference between the 4 and 4a is the presence of a light meter in the Kiev 4.


The Soviet Union produced cameras both for the home market and for export. Those intended for home consumption had their logos and indicators in Cyrillic while those for export used the Latin alphabet. My camera has the logo in both Cyrillic and Latin but other writing is all in Cyrillic, indicating that the camera was not intended for export (сделано в CCCP = Made in USSR ) 

The camera has a very Zeiss Ikon look about it and the body is broadly similar to the Pentacon F and Contaflex - both German derivatives of the Contax, the Pentacon F being East German and the Contaflex being West German (younger readers should consult their history books!).

The camera is heavy - 768g with the standard Jupiter 8 lens - and the controls reveal the camera's design date (1936). the film advance is a knob (usual in the 1930s, very old fashioned in 1969 when my camera was made) as is the film rewind. The viewfinder is very small, hard to use while wearing glasses and (because it is bare metal) likely to scratch modern plastic spectacle lenses. The last anochronistic item is the tripod boss which is 3/8 inch Whitworth. Standard for consumer cameras had been 1/4 inch for some tine (currently 1/4" UNC rather than 1/4" Whitworth but the two are close enough to be interchangeable).

The knob on the right hand end of the top plate has three functions

  1.  in the centre is the shutter release, threaded for a standard cable release.
  2. around the shutter release is a knurled ring to wind on the film and reset the shutter.
  3. The shutter speed selector - operated by lifting and turning the film advance ring.

The manual says that the shutter speed can be selected either before or advancing the the film but that it is better done after advancing then film.

Kiev 4 - top plate
Next to the right hand knob is a window showing the frame numbers. This is nice and large and shows 12 numbers with a red dot indicating the current frame. This counts up from zero and goes to 36. It is reset manually by a toothed wheel on the back edge of the top plate.

Being a rangefinder camera, there is no pentaprism hump but where you might expect to see one there is a light meter. This has a selenium sensor and so has no need for a battery. One drawback of selenium meters is that they can lose sensitivity with continued exposure to light. To prevent this from happening, there is a cover to the meter window on the front of the camera. thesis opened by pushing the cover slightly to the right when it will spring open.

On the top of the meter is the meter window. This has a central lozenge and -2 and -4 marks. The meter is used by turning the control knob on the left until the meter needle is centred on the central lozenge. The -2 and -4 marks are used in low light conditions - they are each one stop away from the central position. If there is insufficient light to get the meter needle to the lozenge, you line it up with the -2 or -4 and then multiply the indicated exposure by either one stop or two stops.

Also on the top of the meter is the accessory shoe. There are no electrical contacts here so this is a cold shoe. It was intended that this accessory shoe would hold an auxiliary viewfinder when longer focal length lenses were used. In the centre of the accessory shoe is the legend сделано в CCCP (made in USSR) and the serial number 6968008 which indicates that the camera was made in 1969 (the first two digits of the serial number being the year of manufacture).

Kiev 4 - accessory shoe
On the left end of the top plate is another multi-function knob. 

  1. The outer knurled ring adjusts the light meter.
  2. The inner ring which is adjusted by two studs to set the film speed.
  3. The centre is a pull up knob for rewinding the film.

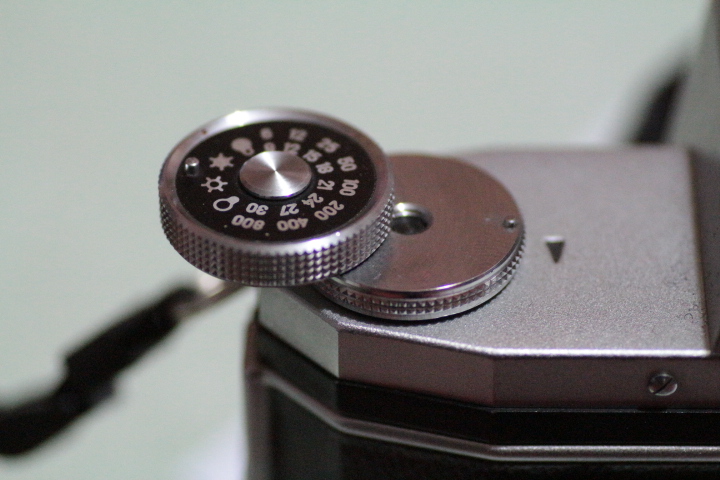
The film speeds are indicated in гост which translates as GOST. This is basically the same as ASA (or ISO). The Gost scale is awkward as it does not have the usual ASA numbers. There is 65, 130, 250 and 500. Using 'western' film, ASA 100, 200 or 400 film requires guessing the position of the film speed selector. If this scale was in DIN, it would be 20 DIN (65 Gost), 23 DIN (125 Gost), 26 DIN (225 Gost), 29 DIN (500 Gost) which is probably the reason for the choices - the camera having been designed in Germany where DIN is usual.

The front of the camera is dominated (as always) by the lens mount. This is the Contax bayonet mount (not to be confused with the Contax/Yashica mount of SLR cameras). There are actually two bayonet mounts here. The 50mm Jupiter 8 lens fits into the mount and latches onto three lugs inside the mount. There is a second, larger, bayonet mount around the distance scale which is for longer focal length lenses.
Kiev 4 - lens mount

This lens mount is connected to the rangefinder and either rotates to focus the lens when the rangefinder wheel is turned (more later) or turns the rangefinder mechanism when the lens is turned. When the lens is focused on infinity it locks inlace. When locked, the lens cannot be focused. It can be unlocked in two ways.

  1. there is a small pointed stud near the upper left of the lens mount which can be moved away from the lens to unlock it.
  2. there is a lever by the rangefinder wheel which you depress as you turn the wheel.

On the right of the lens mount (right as in when using the camera) is a delay action lever. This rotates through just over 90 degrees to wind-up the action. It is activated by sliding a small button which is usually hidden beneath the lever. On the other side of the lens, just below the viewfinder window, is a PC socket for connecting a flash gun.

The rangefinder shares the same eyepiece as the viewfinder. To give as much accuracy as possible to the rangefinder , the two windows on the front are kept as far apart as possible (9 cm centre to centre). This is much further apart than on the Leica which was the main competitor when this camera was designed in 1936 and also than the FED and Zorki copies of the Leica.

Kiev 4 - rangefinder wheel
Just to the right of the light meter and slightly below it is the rangefinder wheel mentioned above. I find this very hard to use as when my index finger is on the wheel ready to turn it, my middle finger naturally falls over the rangefinder window, rendering it inoperable. For me, it is much easier to focus by turning the lens. The rangefinder spot is easy to see and is slightly yellow for maximum contrast. This yellowing is achieved by 'silvering' the internals of the rangefinder with gold.

For those who do not know, a rangefinder works by producing two different images in the viewfinder.
As you change focus, one of the images moves. To achieve accurate focus, you make sure your subject is in the centre of the viewfinder and turn the rangefinder wheel or lens until the two images are superimposed on each other. With practice, this is quick, easy and accurate.

Kiev 4 - rear view
To open the camera, it is necessary to remove the back and base as one unit. At home, working on a table, this is slightly easier than a hinged back. In the field, it is a nightmare. You need to find somewhere to put the back/base while manipulating the film. To make matters worse, the take-up spool is loose and liable to fall out.

The reason for the loose take-up spool is that it can be replaced with an empty cassette, removing the need to rewind the film when finished. This gives a faster reload time - good for studio work but not good elsewhere. I think, in general, this camera was designed with the studio in mind.

Kiev 4 - back/base removed
To release the back/base there are two folding lugs to turn half a turn. Inside the camera is as you would expect a 35 mm camera to be. Until, that is, you look at the shutter. Instead of the rubberised cloth usual until the 1980s, it consists of brass slats which move vertically and are held on cloth ribbons. this works the same as a cloth shutter as distinct from the modern metal shutters. Speeds provided are impressive - up to 1/1250 seconds and down to 1/2 second. The speed range is the modern one of 1/125, 1/250, 1/500 etc.

T
Kiev 4 - detail of brass shutter


The lens supplied is the Jupiter-8M. This is a Soviet copy of the Carl Zeiss Sonnar lens. This lens has six elements in three groups. How well it performs remains to be seen. Someone has attempted to dismantle my lens (never a good sign) evidenced by the aperture adjustment ring being out of kilter. Hopefully, that is as far as they got - none of the internal black paint is scratched which his a good sign. Ro-orienting the aperture ring was simply done.
Jupiter-8M lens - front bezel

The aperture has nine blades which gives a good shape to the aperture. What is curiose is that the aperture blades are curved (see photo) producing a clearly less than circular disc. I will try to produce some booked shots with my test film to see if this makes much difference. 

detail of lens showing curved aperture blades


The Jupiter 8 M is a 50 mm lens with a maximum aperture of f/2 and a minimum aperture of f/22 - quite a useable range. f/22 is about  the limit in 35 mm photography before diffraction softening starts to be a nuisance. The aperture ring has click stops but can still be set between these values  The finish on this lens is shiny chrome with a black lens bezel. - contrasting with the matt chrome on the camera body.

Test film is developed and here are the results. I am quite impressed. Soviet execution of German design is as good as it always is. There are no light leaks - always a bugbear of old cameras, neither in the seals around the base/back nor in the sutler blinds - an advantage, I would think, of using brass rather than cloth. Exposure is even indicating that the shutter blinds are both moving smoothly. There is no lens flare - although these test pictures were mostly taken in rather overcast conditions.

The rangefinder test (see below) shows both that the rangefinder is accurate at close distances and that the lens produces sharp images. The picture of the iron shutter shows the one draw back of a rangefinder camera (or any viewfinder camera, come to that). I had the shutter central in the viewfinder but it is distinctly off-set in the image - parallax problem. Some cameras adjust the viewfinder when focusing closer but not here.

The pictures:

Rangefinder test - focused on the nearest finial
Enlargement of the finial showing it to be in good focus.

Metal shutter showing parallax error in the viewfinder

Lincoln City Square

Witham looking west

Witham looking west


Old bicycle that I use as a test piece for all my old cameras

Indoor shot of Lincoln Central market - fairly slow shutter speed.

Fisherman as Easington, East Yorkshire


 (сделано в CCCP = Made in USSR ) ,  

Tuesday, 9 February 2016

Cosina C1 35 mm film SLR


I got interested in Cosina cameras  while reading about the cameras they make for Big Name companies - companies like Canon, Nikon and Olympus. I started, many years ago, with the impression that Cosina only made cheap, low-spec cameras. That impression is now updated. My first Cosina was a CT1 (article coming) which is (still) sold by Nikon as their FM10 and was sold by Canon as their T60 and Olympus as their OM2000.
Cosina C1 - (C) John Margetts

lens: Cosina 35-70 mm zoom
focal length: 35-70 mm
apertures: f/3.5 to f/22 (nominally)
focus range: 0.5 metres to infinity
lens fitting: Pentax K-mount
shutter: Cosina metal focal plane
speeds: 1 second to 1/2000 seconds
flash: hot shoe, X synch
film size: 35 mm


This camera, the C1, is a much later camera.  The outside is plastic and so is (as far as I can tell) the chassis. This makes it feel to hold much like a modern DSLR. That is not a criticism of the cameras as a photographic device but as a collector of old cameras, the tactile component is important to me.

Once manufacturers turned to plastic mouldings, shape restrictions were removed. With this camera, while the internal chassis seems to still be rectangular (cuboid?) the outside has flowing curves. This is partially aesthetic and partially ergonomic. The camera is clearly designed to be held right-handed. There is a curved. raised portion on the front to give the middle two fingers a good grip and a second raised portion on the back to give a secure grip for the thumb. This leaves the index finger to comfortably sit  on the shutter release button. The curves continue around the pentaprism hump and in the junction between the body and the lens mount. my personal preference is for more classically designed cameras.

Cosina C1, top plate (C) John Margetts
The top plate has the standard layout - film advance lever, shutter release button and shutter speed selector on the right of the pentaprism hump and the rewind crank/door latch on the left. This camera has a standard hot-shoe accessory shoe (and no PC connector). The film advance lever acts as a shutter lock and light meter switch when the lever is flush with the body.

The front of the camera is unadorned apart from the Pentax K-mount lens mount and the name C1. This is the plain vanilla mount with no electrical contacts or autofocus screw. The rear of the camera is similarly unadorned - there is the viewfinder eyepiece and a window to allow the user to see part of the film cassette: ideal for those of us with virtually no memory.

Inside, the camera has no surprises. The shutter is a vertical travel metal shutter which is, I think, Cosina's own make. This offers speeds from 1 second to 1/2000 seconds and is synchronised for flash at 1/125 - marked in red on the speed selector dial. The speeds on the selector dial go anti-clockwise from 1 to 1/2000 seconds (the opposite way to the Cosina CT1).

Cosina shutter
The plastic back fits without light seals. the technique of moulding the plastic allows for sufficient light baffles without the use of foam. there are two exceptions: a small piece of foam by the hinge and a larger piece around the window to the film cassette. These are in good condition and the camera should still be usable without replacing them.

This camera comes with a TTL (Through The lens) light meter. It is powered by two LR44 batteries which are still available. On this camera, the meter does not work.

The lens that came with the camera is, I assume, the kit lens that Cosina provided with the camera when new. It is Cosina's own 35 - 70 mm zoom lens. It has an aperture range of f/3.5 to f/22 at 35 mm and f/4.8 to f/22+ at 70 mm. It is multi-coated and claims macro ability. This macro ability gives an image:subject ratio of 1:5 rather than the 1:1 ratio that is usually thought of as true macro. Focusing is from just under 0.5 metres (1.5 feet) and the focus scale is marked in both metres and feet.

The aperture scale is rather confusing. The aperture ring sets the size of the aperture (as you might expect) but the f-number is a ratio between focal length and aperture diameter. This means that the marked f/ stop depends on the zoom setting. For setting the aperture at 35 mm focal length there is a red dot for the aperture ring and at 70 mm focal length there is a green line (on the zoom scale, 35 mm is in red and 70 mm is in green). For zoom settings between 35 mm and 70 mm, neither mark will be quite right and you could be up to 1/2 stop out on your exposure, depending on whether you use the red dot or green line. in use, 1/2 stop + or - is neither here nor there. marked f/ stops are from f/3.5 to f/22 but this is clearly the case with  zoom setting of 35 mm. At 70 mm, the widest aperture is f/4.8 and the smallest is significantly less than f/22 - I would guess f/32.

The lens mount is Pentax's K mount. It is the plain vanilla mount as introduced in 1975. There are no electrical contacts or auto-focus screw so the lens is fully manual. Any K-mount lens will work with this camera so long as the lens has an aperture ring, and this lens will work on any K-mount camera - but only manually.

The lens is entirely plastic and does feel rather 'plasticky' but the adjustments are all very smooth and the lens looks to be well made.

Saturday, 12 December 2015

Praktica IV

This is an early SLR from the Democratic Republic of Germany. The early Praktica IV were made in 1959 by KW and then, in 1960, by VEB Pentacon. Production ceased in 1964. There were a number of variations on the model and the camera I have is the second series of the first model - the first ones made by Pentacon. This is exactly the same as the KW cameras except for the name plate on the front of the pentaprism hump.

Praktica IV (C) John Margetts
lens: n/a
focal length:  n/a
apertures: n/a
focus range: n/a
lens fitting: M42 screw mount - automatic aperture variant
shutter: horizontal cloth focal plane
speeds: 1/2 to 1/500 second
flash: 2 off PC connectors
film size: 35 mm

This camera is quite hefty - it weighs 718 g with no lens attached - which is roughly half as much again as most of my SLRs but in line with my other German SLRs: Contax F, Contaflex, Bessamatic.

It measures 150 mm by 100 mm tall and 50 mm thick with no lens attached (no lens came with this camera but as it has a M42 lens mount I have plenty of lenses to fit). While the camera does feel quite heavy, it fits well in my hands.

This is an entirely manual camera so controls are minimal and no battery is required. On the far right of the top plate is the film advance knob. This requires exactly one rotation clockwise to advance the film one frame and to cock the shutter. The centre contains the frame counter which needs to be manually set to zero - it counts upwards. As always, I ignore frame counters and continue to shoot until the film runs out - this means I usually get 26 shots from a 24 exposure cassette.

Next to the film advance knob is a button to release the film advance mechanism to allow the film to be rewound. This needs to be pressed just once at the start of rewinding, not held down all the time which makes rewinding film much easier than with many cameras. In front of this is a black painted triangle which I assume is there to remind you which way to turn the film advance knob. Next along the top plate is the shutter speed selector. 


This is fairly complicated (as many cameras were from this time) as there are two ranges of shutter speeds painted on the selector - in red from 1/2 to 1/10 and in black from 1/25 to 1/500 seconds. To make it more complicated, the black range are not in numerical order. The order is 1/25, B, 1/500, 1/200, 1/100, 1/50 and 1/40 (which is indicated by a lightening flash rather than 1/40 to indicate the flash synchronisation speed). On the top of the selector dial is a second ring to select between the red and black ranges. Around the selector dial is a ring that must be lifted before turning to align the red dot on it to the required shutter speed. When the shutter is fired, this selector dial rotates, as it also does when advancing the film. The manual says that shutter speeds can be selected either before or after advancing the film.

Nearly central on the top plate is the pentaprism hump which is enormous. The large size means that the viewfinder image is both large and bright - a very good thing!

Left of the pentaprism hump is the rewind knob. As is common, this pulls up to allow for insertion and removal of cassettes. This rewind knob is strange in that the top half of it can swivel to one side to turn the knob into a sort of lever - see the photograph - which makes rewinding the film much easier.


Rewind knob  - camera in use
rewind knob - rewinding

In the centre of the rewind knob is a disc which can be set to either film speed (9 DIN/6 ASA to 30 DIN/800 ASA) OR to film type (artificial light colour, daylight colour, artificial light mono, daylight mono).

The bottom plate is rather strange. On one end is a cream disc with a 1/4" Whitworth tripod boss and at the other end is a second film advance, this time a lever. This is the first camera I have ever seen with two film advances. The lower, lever, advance is not as easy to use as a standard top plate lever advance but it is quite usable if you do not like using a knob. With my test film, I found myself using the lever.

In the centre (almost centre, not quite so) of the front is the M42 lens mount. This is shared by both Japanese Pentax cameras, German Praktica cameras and Soviet Zenit cameras so there are a lot of affordable lenses available - Super-Takumar from Japan, Helios-44 from the former Soviet Union and a variety from Germany, not to mention smaller makers. I currently have a 55 mm f/2 Super-Takumar fitted.


Inside the lens mount is a mix of old-fashioned and (for then) modern. The mirror is a non-return one. Once you have fired the shutter, the viewfinder goes black until you advance the film. Also, the focusing screen is plain ground glass with no micro-prisms or split-image centre. On the other hand, it has an automatic aperture plunger so the photograph can be composed with the aperture wide open and then it will close itself when the shutter release is pressed. This is itself rather strange. Under the mirror is a small rivet with a red top. Sliding this to the left engages the automatic aperture plunger and sliding it to the right disengages the plunger for when the plunger would foul a non-automatic lens.

Just below the top late and immediately to the right is the shutter release button. Contrary to later Praktica cameras, this shutter release button is not angled but presses in at right-angles to the front of the camera. This is not ergonomically ideal which is presumably why later Prakticas had the angled release.

On the other side of the lens mount are two PC connectors for flash. Then upper one is for electronic flash and is marked with an "X" embossed in the leatherette. The lower connector is for flash bulbs and is marked with an "F" embossed in the leatherette. These embossings are barely visible but I don't suppose that matters as a user would soon remember which connector to use for their own flash gun.

Under the lens mount is a sturdy chrome leg which allows the camera to be stably placed on a flat surface in lieu of a tripod for long exposures. There is no delay action available on this camera to allow inclusion of the photographer in group photographs..


To open the camera, the back comers completely off. I always find this an awkward way to load film when out-and-about - what do I do with the back while both hands are busy with the film?

Inside the camera is much as 35 mm cameras always have been. there is a central film gate with guides to keep the film in the correct place. When loading the film, you need to turn the take-up spool until the two slots are facing you. The film goes in the left hand slot and pokes through the right hand slot. When the film is advanced, the take-up spool turns to take up the film with the emulsion on the outside.

At first sight, the back of the back is plain but careful inspection will reveal items embossed in the leatherette. Centrally at the top is the Ernemann Tower - the logo for Pentacon. Lower left is then word "Germany" indicating that this was an official import to the UK. It is just "Germany" with no qualification that it came from East Germany.

On the lower right is a rather indistinct triangle with a "1" in it. This was East Germany's quality mark to show that the item is of the first quality. What I cannot find, on the back or elsewhere, is any serial number.

Test film.


I have had my test film developed and it is not good - not good at all. 

There is a serious problem with one of the shutter curtains sticking giving very partial exposures: see below. The width of the image is variable and it looks to me like the first curtain is sticking part away across and is then met by the second curtain.


Monday, 23 November 2015

Asahi Pentax ME-F

Pentax were the leading 35 mm SLR cameras through the 1960s and 1970s. During the 1980s, there were a lot of technological advances (not just in photography) and Asahi (the makers of Pentax cameras) were leading the push to develop modern automatic cameras.

The act of producing cutting edge, state of the art cameras necessarily meant also making mistakes. There were a number of innovative dead-ends during this period and the result was that Asahi lost their lead as prime camera makers to Nikon and Canon.

With this particular Pentax model the innovation was auto-focus. this was the first consumer auto-focus camera but using a technique that did not prove to be very effective. Asahi's next auto-focus camera approached the task very differently. As I only have the camera body and not the special auto-focus lens I can make no comment about how well the auto-focus worked in practice.

This Pentax ME F is a development of the Pentax ME Super - itself a development of the Pentax ME. The ME series of Pentax cameras were introduced in 1976 with the ME. The ME Super was introduced in 1980 with the added option of manually setting the shutter speed and this ME-F in 1981. Other M series Pentax cameras were the MG, MV, MV1 and MX.

The M series were smaller and lighter than the Spotmatic and K series cameras - following the lead of Olympus with the OM series of cameras. They also all had aperture-priority automatic exposure (the MX had entirely manual exposure).

lens: none supplied
focal length:  n/a
apertures: n/a
focus range: n/a
lens fitting: Pentax Kf mount
shutter: Seiko metal focal plane
speeds: 4 seconds to 1/2000 seconds
flash: hot shoe and PC connector - X synch
film size: 35 mm

This camera measures 132 mm wide by 87.5 mm high and 50 mm deep not including the lens. It weighs 480g.

The top plate is fairly cluttered resulting in fiddly controls that my rather large fingers struggle to manipulate. On the far right, as usual, is the film advance lever. This moves through about 140 degrees to advance one frame but the first part of the motion - around 45 degrees - is required to engage the advance mechanism. The lever also has a secondary rest position which usually indicates the presence of a light meter switch - I do not know if this is the case with this camera, it could just be to make fast winding possible.

In front of the film advance lever is a window to the frame counter. This counts up from one. Opening the back resets the counter to -2 - indicated by an orange dot - which encourages you to waste two frames to get to frame one. I find I get get an extra frame in by starting at -1. To be honest, I actually ignore frame counters and just shoot until I cannot advance the film anymore which gives me 26 exposures from a 24 exposure cassette in the main.

Next to these is a large black mode dial. This locks in place and it is necessary to depress a (very) small white button to be able to turn the dial. For me, this is a two handed job and is the most awkward part of using this camera. The modes available are L, Auto, M, 125X, and B - more on these later. In the centre of the mode dial is the shutter release button. This fires the Seiko metal focal plane shutter.

Between this dial and the pentaprism hump are two small buttons which alter the shutter speed when in manual mode. These buttons are actually plenty large enough even for my fingers but they are in a rather restricted space. The pentaprism is of the size needed - there is not much scope fore reducing this in size as cameras get smaller as it still has to show the full 24 x 36 mm frame. On top of the pentaprism is am accessory shoe. At this date it is basically a flash shoe and has hot-shoe connections. This is a large central contact  allowing the use of any hot-shoe flash gun. There is also a small secondary contact for Pentax specific flash guns with added functionality. It is also possible to use a cold-shoe flash as there is also a PC (Prontor-Compur) connector on the front of the camera.

On the left of the pentaprism is a switch to activate the auto-focus function. This is useful even without the dedicated auto-focus lens as the camera has a focus confirm function with any lens. This switch has three positions - off, 2.8 and 3.5 The last two relate to the maximum aperture of the lens being used. Behind this switch is a second switch which turns the audible focus-confirm on or off.

To the far left of the top plate is the folding rewind crank. Around this is the film speed setting for the light meter. This ranges from 12 to 1600 ASA (ISO). 12 ISO seems very slow by modern digital standards but films available in 1980 were very slow. This setting is set be slightly lifting the outside of the ring and turning. This ring also sets exposure compensation from x4 to x1/4 (that is, +2 stops to -2 stops) which is set by turning the ring without lifting. Pulling up on the rewind crank itself unlocks the door.

The front of the camera is uncluttered. Right of centre (looking at the front) is the Pentax K mount bayonet fitting. this is an adaptation of the original K mount known as Kf mount as it has four sprung electrical contacts and one unsprung contact. These allow the camera to communicate with the special auto-focus lens. This is the only camera with this version of the K mount. There were later variations on the K mount with electrical contacts in other parts of the mount ring. All these are backwards compatible. I am successfully using a lens with the later version of the K mount with this camera. I lose the later functionality of the lens but it still works fine as a fully manual lens.

On the right side of the mount is a PC connector which allows the use of flash off-camera. On the left of the lens mount is a delay action lever. This is not connected to the shutter release button. First  you wind the mechanism by turning the lever down in an anti-clockwise direction. Second, you start the process by pushing the lever back up very slightly. The delay is about eight seconds.

On the back of the camera (which is made from painted steel) are three items. most obviously is the viewfinder eye-piece. This is nice and large and works well for those of us who wear glasses. When looking through the viewfinder you get the expected ground glass screen. In the centre is a ring of micro-prisms and a split-image centre to aid focussing. On the left of the viewfinder image is a vertical list of shutter speeds. These range from 4 seconds to 1/2000 seconds. The selected speed is indicated by a small green or orange LED. There is also a reminder at the top of the list if you are in manual mode. At the bottom centre of the viewfinder is a green hexagonal LED flanked by two red triangular LEDs. The red LEDs light when the lens (any lens) is out of focus and the green LED lights when the lens is in focus. There is also a noise if the switch mentioned earlier is on.

On the right of the rear of the top plate is a small window revealing vertical red and black bars. These 'dance' when you advance or rewind the film. The idea is that if the film is not properly loaded the bars do not dance saving you taking pictures with no film in place. Personally, I always watch the rewind crank turn for the same reason. However, the dancing bars do work.

In the middle of the back is a device that all film cameras should have - a holder for the end of the film carton. If, like me, you have more than one camera on the go at a time, it is easy to forget what film is in which camera. Below this holder are two more electrical contacts for the optional data back.

On the base plate there are a number of items. on the left under a round cover is a mechanical connection for an electrical film winder. Next to this is the button to release the rewind mechanism. In line with the centre of the lens is a 1/4 inch UNC threaded tripod socket (the old standard was 1/4 inch Whitworth which is as near as dammit to the modern standard). To the right of this is the battery compartment. This holds four button batteries which are still available today. Beyond the battery cover is a release button to undo the battery cover catch.

In use.

Loading film is as easy as it can be made short of full automation. The back is opened by pulling up on the rewind crank - as was usual with cameras of this age. The film cassette goes on the left - the rewind crank is pushed back down to hold the cassette in place - and the film is pulled across the camera and the leading edge is pushed between any two of the many white bars on the take-up spool. Very simple and hard to go wrong.

Above the white bars on the take-up spool is a fairly loose plastic ring. As the film moves past this ring when advancing the film, the movement in the loose ring is transferred to the red and black dancing bars. visible through the window on the back of the top plate. Once you have loaded the film and closed the back you need to 'waste' two frames as these have been fogged while the back was open. At this point, the frame counter should read '1' - remember to put the end of the film carton in the memo holder and you are ready to go.

The photographer needs to set his choice of aperture and focus the lens and the camera does the rest. The viewfinder is nice and clear and the split-screen centre works as it should.

This is a delightful camera to use. My only real niggle is turning the camera on. this involves pressing a very small white button on the black mode dial and turning the dial to Auto or M or 125x. The L position is off and this switches off the meter and locks the shutter release button - the shutter can still be fired in this position by using the self-times lever.

Auto reads the aperture from the lens and selects the most appropriate shutter speed - this is not restricted to the displayed speeds, any intermediate speed can be selected. The M mode requires the user to set both the aperture on the lens and the shutter speed using the two buttons next to the pentaprism - in this case only the displayed speeds may be selected.  The 125x speed is used to synchronise the shutter and the flash at 1/125 seconds. There is also a B setting which leaves the shutter open as long as the shutter release button is depressed. I find using this dial very difficult and have to use both hands. Once the mode dial is set, I leave it set until I have finished for the day.

To use this camera with the full complement of shutter speeds requires working batteries. If they are flat, the camera can still work in mechanical mode but this restricts the camera to 1/125 seconds shutter speed. This is clearly less than ideal but does mean that you can continue to take photographs if you have no spare batteries.

I do not have the auto-focus lens but the auto-focus system will give focus confirmation with any lens. this is in the form of a green LED indicating focus and two red LEDs which indicate the direction you need to turn the focus ring on the lens to obtain focus. I found these to be completely useless - they did work but the audible confirmation is rather more useful - actually, my eyes offer a faster focus confirmation.

Test photographs - Agfa Vista colour negative film.


Hand held, indoors 


A nosey of twitchers