Tuesday, 18 November 2014

Agilux Agifold

AGI, who made this camera, are an aeronautical instrument maker - still in business - rather than a camera maker and it shows. During WWII, AGI made military instruments and that pedigree is followed in this camera. It is large and heavy and has no small controls so easy to use with cold hands, with gloves on, when frightened . . . 

lens: Agilux anastigmat
focal length:  9 cm
apertures: f/4.5 to f/32
focus range: 3 feet to infinity
lens fitting: fixed
shutter: Agifold
speeds: 1/25, 1/50, 1/100, 1/125, B, T
flash: two pin connector
film size: 120 or 620


Outwardly it is much like any other folding camera - Kodak, Zeiss Ikon, Voigtlander, Agfa all made similar. The main physical difference is the large double viewfinder. This consists of one large housing containing both an eye-level finder and a waist-level finder. The waist-level finder is pretty much a pre-war brilliant finder. This viewfinder housing also double as the catch for the lens board - it moves to one side to open the front. This housing is central on the top of the camera. Beside it is a shutter release button. This button links, via a series of links, to the shutter release on the shutter housing - again, standard fare for a mid-twentieth century folding camera. On the other side of the shutter housing is the film advance knob. this is nice and large and easy to use. Being a 120 format camera, there is no film rewind.


The shutter is made by AGI themselves but outwardly it looks much like a Compur or Prontor shutter. The adjustments are in the same place the main difference being the shutter cocking lever which is on the underside of the housing - rather inconveniently. The shutter release is also on the underside where it nicely links to the body release. The actual shutter itself is not in the same league as Compur or Prontor - it has only two leaves and is rather reminiscent of a box camera shutter. The speed selection is non-standard as well. 1/25, 1/50 and 1/100 are much as I would expect from 1948 but the next speed is 1/125 - the increase in speed is so small as to be pointless. It is usual for the shutter speeds to double in speed from one setting to the other which is one stop reduction in exposure but this is a 25% reduction and it is hard to see a use for it.

The lens is also made by AGI themselves (at least as far as I can gather from information on the Interweb) and is a 9 cm focal length (or 90 mm in modern parlance). The negative size is 6x6 cm so a normal lens would have a focal length of 85 mm. That makes this lens slightly longer than normal for the negative format, but not seriously so. The lens is coated (not a given in 1948) but I suspect only on the front surface. This has the distinct blue cast of a coated lens but the rear element is clearly not coated - no blue cast.

Being a 120 format camera, there is a window on the back to allow the user to see the frame numbers when winding the film on. Traditionally, these are red - red because early film was orthochromatic and not sensitive to red light - but on this camera you get a choice of red or green. There is a slider to uncover one or the other of these two coloured windows. What there is not is a cover for both windows which would have gone further in preventing fogging of the film.


I have been referring to this as a 120 camera but in fact it is a dual format camera - it will take either 120 or 620 film. The only difference between the two is the spool (the actual film being the same size with the same frame number spacing) and the spool holders here will take both sizes. The camera came to me with a 620 spool in place and I have now fitted a 120 spool to check the fit.

There is no accessory shoe so no way to fit either a rangefinder or a flash gun.  However, there are flash contacts - not the industry standard PC socket but two metal posts on the side of the shutter housing. These can be seen in the photograph of the lens above on the top right of the shutter housing.

When I took delivery of this camera, it was in quite a sad state. It had obviously been in a smokers house - it was covered in a sticky brown deposit - and also stored somewhere damp. Diligent use of WD40 and cotton buds has brought the camera up nicely - not quite in showroom condition but just about presentable. The shutter is not quite as I would like. An hour or so of dry-firing the shutter has it firing reliably and it sounds to be in the right general area speed-wise. One fault it has is that when set to 1/100 seconds and fired a few times the shutter resets itself to 1/50 seconds.

I am still in two minds as to whether I am going to try a film in this camera but if I do I will post the results here in due course.

Tuesday, 4 November 2014

Mamiya EE Super merit (AKA Mansfield Eye-tronic)

Mamiya made cameras both for themselves and for re-badging by other companies.  This camera is re-badged by the USA company of Mansfield. It is badged as a Mansfield Eye-tronic but is actually a Mamiya EE Super Merit. This model was also available in the USA as a Honeywell Electric Eye 35 and in the UK as the Vulcan.  The camera is well designed and well made as I would expect from the Japanese in 1962 (the year of this model's introduction, in September).  That makes this camera 50 years old (give or take a year) - and it is in very good condition. It all functions as it should, the only real deterioration being the foam light seals - as is usual on Japanese cameras of any age, these are reduced to a sticky goo and I have partially replaced them. The seals I have replaced are the two ends: around the hinge and around the catch. The long seals top and bottom of the back look to be recessed enough not to cause any trouble - I shall see for sure when my test film is completed (12 exposures of Fomapan 200 Creative).

lens: Mamiya-Kominar badged as Mantinar
focal length:  40 mm
apertures: f/2.8 to f/22
focus range: 1 m to infinity
lens fitting: fixed
shutter: Seikosha
speeds: 1/30, 1/60, 1/125, 1/250
flash: PC socket
film size: 35 mm

Front view - lens with a Petri UV filter in place


This camera is about the standard size and weight for a fixed-lens Japanese rangefinder camera of the period. it measures 130 x 60 x 80 mm and weighs xxxg. Of the three Japanese rangefinders I own, this is the most thoughtfully designed. 

The top plate is spare. On the left is the rewind crank which is slightly proud of the top plate when not in use. In the centre is the accessory shoe - a cold shoe as it has no flash contacts. In front of then accessory shoe is stamped the name "Mansfield" - this would say "Mamiya" on a non-re-badged version or "Honeywell" or "Vulcan" for the other brands of re-badged Mamiyas. On the right of the top plate is the frame counter - this counts down to zero so needs to be set at the film length when you load the film. I don't usually bother with frame counters - I just keep using the camera until the increased tension in the film advance tells me the end has come. With this camera it is, if not essential, then very useful to set the frame counter as when the film is finished the film advance lever keeps moving with no change in tension. What this camera does is when the frame counter reaches zero the word "END" appears in the viewfinder. You can keep winding the film and pressing the shutter release but the film is not moving and you are repeatedly exposing the same last frame.
Top view
The front has no surprises. The viewfinder bezel is at the top. This is black plastic with a very worn (on my camera) chrome outline. The viewfinder is slightly to the left of the lens and the rangefinder window is slightly to the right (both as when using the camera).

The viewfinder has bright-lines and the display for the light meter. There are no parallax markings for close-ups as the viewfinder physically moves as you focus the lens. This is quite a sophisticated facility for a mid-range camera. The viewfinder also includes the word "END" when the frame counter reaches zero.

The rangefinder spot is yellow (as is usual) but is an undefined blob which makes using the rangefinder harder than it should be. Having said that, it does work in good light - test photos will tell me how well. Both the light meter and the rangefinder are coupled.
Inside
Below the viewfinder bezel is the shutter assembly. The shutter is made by Seikosha and is a leaf shutter. the camera offers a choice between automatic and manual exposure control. In auto, the required shutter speed is set and the diaphragm set to auto - the camera selecting the aperture. See the notes on the test film to see how well this works. If you want manual control of the exposure, you can set the aperture as well as the shutter speed. the light meter display in the viewfinder will tell you the required aperture for the set shutter speed (the only time you need to look at the light meter display) or you can use a hand-held light meter to gauge exposure (see below where I have tried all three methods on one picture).

back
On the bottom of the shutter housing is the selector for the film speed. this shows the camera's age as it goes as low a 10ASA/11DIN but only as high as 200ASA/24DIN. The lens itself is surrounded in common Japanese fashion with a circular selenium light sensor. This means it is always pointing the same way as the lens and gets covered by any filter used. In turn, this means that no exposure compensation is needed with filters - as good as you can get without TTL metering. Incidentally, selenium means that no battery is required for the light meter to work.
Underside of lens showing DIN/ASA selector
To the right of the shutter housing is the shutter release button. Personally, I do not like face mounted shutter releases but I have to admit that this one is fine in use. There is a screw socket for a cable release but this is on the top plate. On the opposite side of the shutter housing is a PC socket for flash. There is no means of synchronising  the flash so I assume it is intended for FP bulbs or electronic flash.

The back of the camera is very plain - just the viewfinder eyepiece and the film advance lever. Inside, film attachment is very simple and is about the easiest I have ever come across. There is a generously wide slot with a prominent tang to fit into a sprocket hole. Most 35mm cameras have a shaft with top and bottom sprocket wheels. Not here. There is a single large sprocket wheel below the film gate. This does nothing with the back open making it easy to secure the film to the take-up spool - the film advance will keep moving the film without the user having to repeatedly press the shutter release. Once the back is shut, this sprocket wheel will only allow one frame to advance at a time.
Shutter set to shutter priority automatic exposure
The base of the camera is also bare - just the tripod boss (1/4 inch) and the rewind button.
Shutter set to manual exposure.


Test film results.

The results are good. In the pictures, the horizontal bars to be seen in the sky in some pictures are a scanning artefact due to the negatives being a bit thin (i.e. under-exposed). Overall, both focus and exposure are as they should be producing usable negatives. Although not all the negatives have scanned well, they would produce reasonable silver -prints.
Derelict factory, Stamp End, Lincoln

Social housing estate, Lincoln

River Witham, Lincoln

Footpath
 This next photograph is a test of the rangefinder. I focussed on the nearest pale ball on top of the black steel fence. It is not quite in focus - focus being just a bit closer than it should be (look at the black top rail of the fence just this side of the pale ball).
Rangefinder test

Stamp End lock, Lincoln

River Witham, Lincoln

 This is what happens if you continue to take pictures after the film has ended. The camera does nothing to stop you (apart from displaying the word "END" in the viewfinder) and you end up with multiple exposures on one frame.
The last frame of test film - multiple exposure
 These last three show the effects of 1) using automatic exposure, 2) manual exposure using the built-in meter and 3) manual exposure using a separate hand held meter. All three are exposed well enough to be usable with the automatic exposure perhaps being the best exposure. it is a bit surprising that using the built-in meter automatically differs from using the same meter manually, but the difference is there.  This is possibly due the the camera being able to select in-between aperture values while with manual exposure you have to use one of the marked aperture values. The last exposure, using my trusty (and trusted) Ikophot meter is of more concern as it is clearly rather underexposed.
Child's bike - auto exposure

Child's bike - manual exposure using built-in meter

Child's bike - manual exposure using Zeiss Ikon Ikophot hand held meter.

Thursday, 23 October 2014

Voigtlander Vito CLR


This is a development of Voigtlander's Vito range. That started as the folding 35 mm Vito of 1939. The folding Vitos were replaced by the rigid bodied Vito B in 1954 . The Vito B sired a small range - Vito BL, Vito BR and Vitomatic. Then in 1960 came the Vito C and a small range - Vito C, Vito CD, Vito Cl, Vito Cs, Vito CLR and Vito CSR and these were followed by the Vito Automatic (very different to the Vitomatic of 1957).

So, this is the third range of Vito cameras. The name, Vito CLR, tells us it is the C range with a light meter and rangefinder. Both the light meter and the rangefinder are coupled to the shutter.
Voigtlander Vito CLR  (C) J. Margetts

As I usually do, I shall start with a physical description of the camera, followed by notes on using it.

My camera is the third iteration of the deluxe version. Deluxe means there are slight variations on the layout of the top plate and I get a ring of black leatherette around the base of the shutter housing. The camera is somewhat bigger than the Vito B - it measures 125 mm by 85 mm by 75 mm and weighs xxxg. The main difference in appearance is that the camera now has a 'standard' hinged back fastened with a catch on the left-hand side. This is much easier to use than the Vito Bs somewhat strange back (although I like the Vito B's back for its idiosyncrasy).

On the top plate on the left is a recessed rewind knob. This has a turnable film reminder which can be set to either blue or yellow - sunlight or artificial light? Just right of centre is an accessory shoe. As was usual at the time this camera was made, there are no flash contacts so this is a cold shoe. To the right of the accessory shoe is the window for the light meter. This is reflected into the viewfinder so you can set the exposure without removing the camera from your eye.

Top plate - (C) J. Margetts
On the back of the camera there are three items. On the left is the viewfinder eyepiece. This has bright-lines directly on the rear glass with parallax markings for close-ups. Below the viewfinder and slightly to the left is a lever to raise the rewind knob and free the film advance mechanism. To the right of the back is the film advance lever. This moves through 220 degrees as far as I can judge and advances the film one frame and cocks the shutter.

The front of the camera is a lot busier. At the top is a chrome rectangular bezel. This contains on the left (while looking at the lens) the light meter lens, above the shutter housing the rangefinder window and on the right the viewfinder window.

In the middle of the front, just off centre, is the shutter housing. This contains a Gauthier Prontor 500 LK shutter. The outer ring on the housing is the focussing ring. This ranges from 1 metre to infinity (my camera is marked in metres rather than feet which usually means a grey import but the body is clearly stamped 'Made in West Germany' so it is a factory import). This ring has three Happy Snapper settings at 1.3 m, 3.2 m, and 10 m. The last one is the hyperfocal distance at f5.6 and the middle one is the hyperfocal distance at f16.

The next ring is the shutter speed ring - this adjusts from 1/15 to 1/500 and B. This is also used to set the film speed for the light meter - you need to depress a small black tab immediately behind this ring while setting the film speed. Behind the shutter speed ring is the aperture ring which runs from f2.8 to f22. this ring has two sizeable black tabs attached which makes finding the ring by feel easy - this is important when setting the exposure with the camera at your eye.

Add caption
In the centre of the shutter is the lens - a Color-Skopar f2.8 50 mm lens. This is front cell focussing so not ideal but will still produce excellent images. The lens will take 32 mm push fit filters and lens hood. To the left of the shutter housing (again, while looking at the lens) is the shutter release button. This is threaded on then underside for a standard cable release. Below the shutter release is a PC flash connector.

The base of the camera has then usual 1/4 inch tripod boss - slightly left of centre and slightly forward - and a frame counter. The frame counter counts down so tells you how many frames you have left.


Vito B (top) Vito CLR (bottom)

27/10/14

I have completed a test film using Fomapan 200 Creative. This has shown up a problem with the camera - one the seller drew my attention to - the exposure meter under-exposes by around two stops. So, using this camera I need to set the meter for ASA 50 rather than the correct ASA 200. I suspect this is due to the selenium  sensor in the meter deteriorating. This is something we are always warned about with old selenium meters but not something I have actually come across before (it could, as the seller suggested, be the setting ring having moved from its correct position, but I doubt it).

Because of the metering problem, the negatives are very thin and getting a good scan has been difficult. tonal range is not as it should be and there are very visible horizontal lines in each picture. There is also some evidence of a light leak in the pictures - it is on the left-hand side which means it must be from around the hinge of the back. In some pictures it is not very evident, so, perhaps, if the pictures were exposed correctly, it would not be a problem. There are no foam light seals in this camera to deteriorate.

Second test film results are below the monochrome results.

Cathedral from Broadgate, Lincoln

City Square, Lincoln

High Street, Lincoln

Add caption


Flowers to test the lens for close-ups.


Second test - with Agfa Vista+ colour film, processed by Snappy Snaps in Lincoln.  Negative density is fine, so the earlier problems were either lack of use or my developing of the film.


Saturday, 11 October 2014

Petri 7s rangefinder


I recently made a decision to add a few rangefinder cameras to my collection. I have had a Minolta Uniomat for a few years and recently bought a Zorki 4. These two cameras represent the two lines of rangefinders that were available in the world of film.

The Zorki is from the line of interchangeable lens rangefinders that follow on from the Leica. Most of these are fairly straight copies of Leicas - all German patents were declared void after the end of WWII - with varying degrees of development.

The Uniomat is from the other - fixed lens - line. These fixed lens rangefinders are cheaper, though never cheap. Not having an interchangeable lens means they can - and do - have between-the-lens leaf shutters.

Petri 7s - front view [(C) John Margetts]
My collection of fixed lens rangefinders now numbers five (I am only including those with a coupled rangefinder) - Vitomatic II, Contessa LKE, Uniomat, Minister III and now this Petri 7s.

This Petri 7s is exactly the same size and shape as the Minister III - I could almost suspect they used a common casting for the body. The weight is not too different, either - 632g with a film loaded.

lens:  Petri
focal length:  45 mm
apertures: f2.8 to f16
focus range: 0.8 m (2.6 ft)
lens fitting: fixed
shutter: Petri MVE
speeds: 1 s to 1/500 s
flash: PC socket
film size: 35mm

The top plate of the Petri 7s is uncluttered. On the left is the rewind crank. This is the now standard fold-out crank which I personally find hard to use. The crank pulls up to allow for the insertion/removal of the film cassette.
Petri 7s - top plate [(C) John Margetts]

Just left of centre is the accessory shoe. By the time this camera was designed (1963) this was usually for a flash gun. It is a cold-shoe - accessory shoe contacts had to wait a further decade to become standard. To the right of the accessory shoe is the light meter window. This is fairly small - the actual window is 5 mm diameter - and incorporates a lens to make seeing the needle and mark possible.

Next along is the shutter release button. This is fairly large - no bad thing - and is threaded for a standard cable release. On the rear right-hand corner of the top plate is the frame counter. This is also a bit on the small size but still usable.

The front of the camera is dominated by the shutter housing. This is fairly large for a fixed-lens camera - the size is necessary because of the light meter sensor around the lens (as in the Yashica Minister III). 
Petri 7s shutter housing [(C) John Margetts]

The lens is a 45 mm f2.8 lens. It has no name on it apart from Petri. A green 'C' signifies that it is a coated lens - normal for the time - but does not tell us if it is multi-coated or single coated. As far as I can find out, it is a Tessar copy - four elements in three groups for the technical minded.
--------------------------------------------------------------------------------------------------------------
Blog (C) John Margetts 2014
--------------------------------------------------------------------------------------------------------------
The shutter housing has several controls on it. There are the expected control rings - focus, aperture and shutter speed - a flash synchronisation selector (X or M), a delay action lever, film speed selector and a PC connector for the flash. The shutter housing carries the name 'Petri MVE'. The shutter itself is a leaf shutter which means it is quiet in use - excellent for street work.

Above the shutter housing is an elongated window containing the rangefinder window and the viewfinder window. The viewfinder is a reverse Galilean finder (like looking through a telescope the wrong way) and the image is coloured a pale green. On the right-hand end of the front, just below the shutter release, is another window but one that does not seem to have any purpose - perhaps for a facility intended but not implemented. The viewfinder has bright lines with parallax markings. It also has a repeat of the light meter needle. This is much easier to see than the one on the top plate. It is not, however, easier to use as it is very hard to distinguish between the shutter speed and aperture rings by feel.

Petri 7s spurious window [(C) John Margetts]
The rear of the camera is plain. There is the eyepiece of the viewfinder and the film advance lever. The base of the camera is also plain. It contains a tripod boss in line with the centre of the lens (1/4" Whitworth is what I usually say, but it could well be modern enough to be 1/4" UNC. The ISO standard for tripod threads is UNC rather than Whitworth but there is not much difference between the two and Class 1A threads (to be tightened by hand) are sloppy enough to be interchangeable between Whitworth and UNC), and a recessed button to allow for rewinding the film.

Petri 7s rear view [(C) John Margetts]
Using the camera is quite easy. Setting the film speed for the light meter is a matter of rotating the black tab in front of the shutter speed ring - this is on the lower right of the shutter housing. The selected film speed appears in a small window in the shutter speed ring to the left of the fastest shutter speed. This is in both DIN and ASA and goes from 11 DIN/10 ASA to 24 DIN/200 ASA. (ASA is broadly but not technically the same as ISO) This seems a bit of a slow range by today's standards but when the camera was made, it would have covered all the films likely to be used.

To set the exposure, you can either set the required shutter speed and then rotate the aperture ring until the meter needle is centred, or set the required aperture and adjust the shutter speed ring, again until the needle is centred. The meter is a selenium meter which means it does not need batteries. These can deteriorate if left exposed to light for many years but this one is still fine (actually, I have never come across a selenium meter that was not fine - I think the deterioration thing is mostly theoretical rather than real-world).
--------------------------------------------------------------------------------------------------------------
Blog (C) John Margetts 2014
--------------------------------------------------------------------------------------------------------------
The focus ring has a large knob on the left-hand side which makes focussing with the left hand easy. There are two options for focus - scale focus or rangefinder. For scale focus, there is a big drawback in that there is no depth of field scale which makes my usual hyperfocal method impossible. The focus scale is in both feet and metres.

Using the rangefinder is not as easy as it could be. Petri have tried to make the rangefinder clear by colouring the viewfinder field a pale green and the rangefinder spot yellow. In my camera, the rangefinder spot is rather faint. In good light it does work, though, and it is quick to focus if you have suitable verticals in the frame.

The shutter release works easily without needing undue pressure but without being too much of a hair-trigger. The film advance moves about xx degrees and makes a very definite 'clunk' as it cocks the shutter.

The only other thing worth noting is that there are strap lugs at either end so I can carry the camera on a strap around my neck without needing to use the ever-ready case.

Test pictures.

I am testing this camera with Fomapan 200 Creative film - it is also a test of the film, to some extent as I have never used it before.  I have a 17 metre roll of film and can cut off the amount I need - I am using a 12 exposure length for this test.  This should save me quite a bit of money compared to buying colour film and paying to have it developed.  I should have developed the film in the next few days and will post the results here when I have done so.

27/10/14

As well as testing the camera and film, I am also testing my developing of the film - it is basically developed OK but I can tweak it somewhat in the future to improve contrast. There are some horizontal lines visible - these are scanning artefacts due to the emulsion being a bit on the thin side.

Flooded ex-gravel pit.

The Strait, Lincoln

Steep Hill, Lincoln

Angel Coffee House, Lincoln - hand held in natural light.

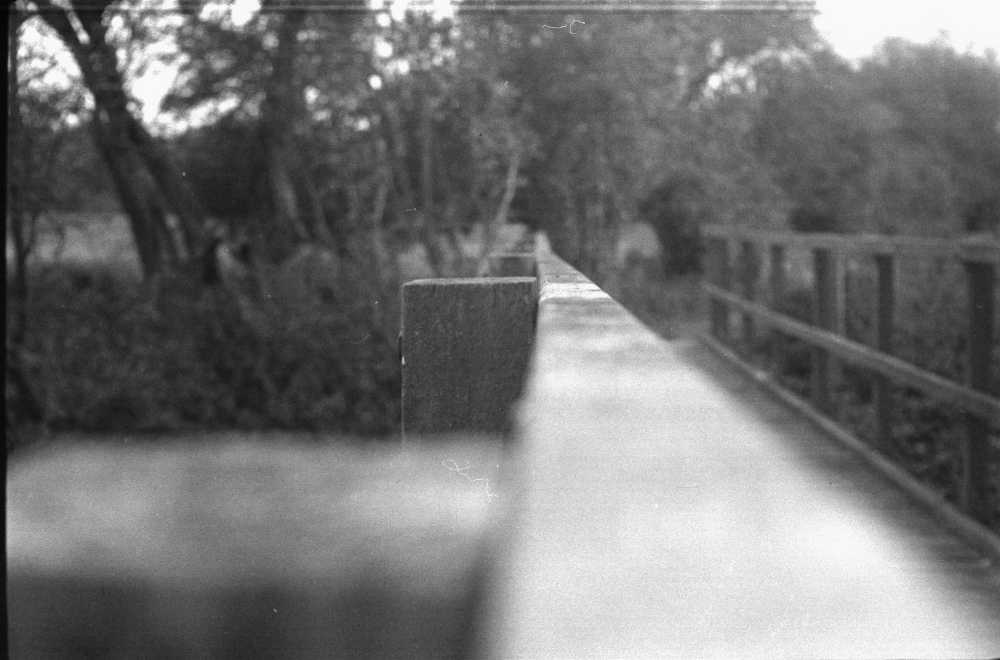
Wooden bridge to test the rangefinder - I focussed on the larger wooden upright.